How to install Google Nexus 7 adb & fastboot drivers on Windows XP / Vista / 7? It is very simple because there is Google Nexus 7 ToolKit to help. Just follow the on-screen instructions from Google Nexus 7 ToolKit to install adb & fastboot drivers on PC. It will help to install these drivers automatically.
Prerequisites
- Google Nexus 7 ToolKit
Do make sure that you have Google Nexus 7 ToolKit installed. Then you are ready to install Nexus 7 USB driver.

How to install Nexus 7 adb and fastboot drivers on Windows XP / Vista / 7?
- Launch Google Nexus 7 ToolKit.
- Type no and enter when asked – Do you want to check if an Update is available?
- Type 1 and enter – Install/Uninstall Google Nexus 7 Drivers on your PC.
- Follow the on-screen instructions to install.
- Note – Select ‘Install this driver software anyway’ when Windows Security prompted.
- That’s all.
If everything goes smoothly, you should have Nexus 7 adb and fastboot drivers installed. You can enable Nexus 7 USB Debugging Mode and load Nexus 7 Fastboot Mode to test the USB drivers are working or not. You should get these when connect Nexus 7 to PC with USB cable.
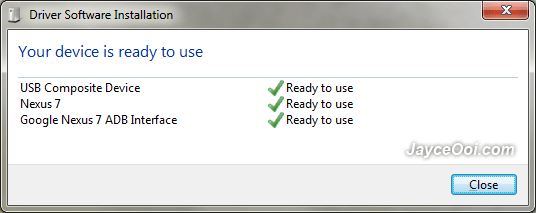
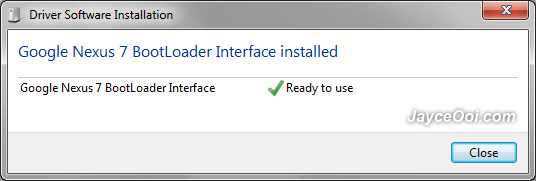
Finally, at Google Nexus 7 ToolKit in ADB Mode (USB Debugging Mode). Your Nexus 7 serial number will be shown if Nexus 7 adb and fastboot drivers installed successfully.


